Access Denied
IMPORTANT! If you’re a store owner, please make sure you have Customer accounts enabled in your Store Admin, as you have customer based locks set up with EasyLockdown app. Enable Customer Accounts
Artwork Help Guide
To create your own custom products, you will need to download one of our templates before getting started.
Below is a helpful step-by-step guide on how to add your designs to our templates.
Once that's done, sit back, relax, and we'll bring your products to life.
1. DOWNLOAD YOUR TEMPLATE
To make it as accessible as possible, we've created two downloadable templates in .ai and .pdf format.
If your artwork uses vectors, or is saved as an EPS, we recommend using Adobe Illustrator. If you're more comfortable with Photoshop, download the PDF.
We've even tested a few free Photoshop alternatives, all of which will open the files and allow you to add your artwork:
Free Alternatives To Photoshop For Editing PDFS
Free Alternatives To Illustrator For Editing EPS Files
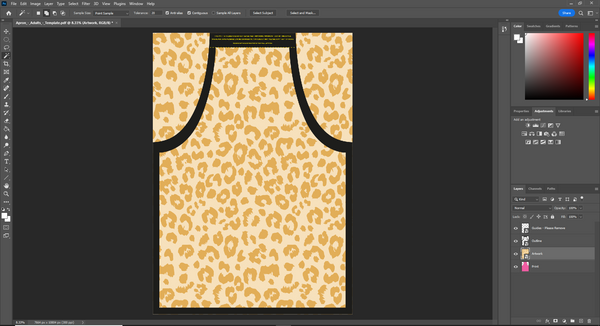
2. OPEN YOUR TEMPLATE

(Example: PDF Apron template in Photoshop)
When you open the template, you'll see that each layer has been named accordingly for easy navigation.
3. ADD YOUR ARTWORK
Create a new layer and add your artwork. Reorganise your layers so you can see the outline layer on top of your artwork file.
What each layer means:
- Guides - When the 'Guides' layer is visible, you'll be able to see yellow dashed lines. These show you the best/safest place to put the centre of your design. If you have important characters or text, it's best to make sure they fall within these safe spaces. Hide this layer before saving your file (otherwise the yellow will be printed)
- Print - The print layer in pink shows the whole space your artwork will be printed on. If you have an all over design, make sure to fill the pink space - otherwise you might end up with white gaps around the edges.
- Outline - If the product has an outline - like Bunting or Aprons - this will be printed around your design. You can also hide this layer before saving.
If your artwork fills the whole template, you can leave this as is, or use the clipping tool to remove the excess from around the outline:

4. SAVE YOUR ARTWORK
Export your final design as one of the following formats:
- JPEG
- TIFF
- PNG
Note: All artwork needs to be a maximum of 40MB or 10,000 pixels in order to be accepted by our site's system.
5. CREATE YOUR PRODUCT

Now that you have your artwork set to the right dimensions, and saved in a format that works for the site, head back online to the product page and click 'Customise'.
A box will appear, and you'll be able to 'add images'. Select your artwork and see how it looks in the preview.
If you're happy with how it looks, click 'Add to Cart'. If you're not, head back to your artwork file and do a little tweaking.
6. CHECKOUT
You'll notice on the cart page, you'll get another chance to select 'redesign' if you decide you're not happy with the end product.
Once the purchase is complete, you won't be able to cancel or adjust the artwork, so make sure you're certain.
You can enter your customer's address to send their order directly to them. Or, if you'd like to add your own packaging or compliments slip, have the item sent to you first.
Still having issues? Contact us here.
Invalid password
Enter